S/MIME Certificate Installation And Management
Introduction
Let’s talk about something incredibly important in our digital lives that often flies under the radar: securing our email. We send so much sensitive information through email every day, personal details, financial documents, business strategies, and yet we often treat it like a postcard. That’s where S/MIME certificates come in, acting as your digital seal and lock, ensuring your messages are truly yours and only for the eyes they’re intended for.
You might be thinking, “S/MIME? Sounds a bit technical for me.” And honestly, you’re not alone. Many people hear “certificate” and “encryption” and their eyes glaze over. But trust me, setting up an S/MIME certificate, and more importantly, managing it, is far more approachable than it sounds.
Think of it like setting up a secure gate for your digital mail, once it’s in place, it works quietly in the background, giving you peace of mind.
This piece will guide you through the process of making the S/MIME certificate setup feel natural and straightforward, from understanding where to get one to keeping it in tip-top shape.
Understanding The Foundation
Before we dive into the nitty-gritty of installation, let’s understand the bedrock of S/MIME: Certificate Authorities (CAs). Imagine a notary public, but for the digital world. CAs are trusted entities that issue these digital certificates, vouching for your identity online. They are the backbone of digital trust, ensuring that when you receive an email signed by someone, you can be confident it truly came from them.
There’s a whole ecosystem of CAs out there. You have the big players, the household names in digital security like DigiCert, GlobalSign, and Sectigo. These commercial CAs offer a range of certificate options, often with different levels of validation and features, tailored for both individuals and large enterprises. They usually come with a fee, reflecting the rigorous validation processes they undertake.
However, the landscape isn’t solely dominated by paid options. In recent years, we’ve seen a rise in CAs offering free S/MIME certificates. A notable example is Actalis. While these free options might have certain limitations compared to their commercial counterparts (perhaps in terms of support or validation levels), they are a fantastic entry point for individuals looking to dip their toes into secure email without an initial investment.
When choosing a CA, consider your needs. Are you an individual looking for basic email security? A free certificate might suffice. Are you a business handling highly sensitive data and requiring maximum assurance? A commercial CA with advanced validation might be the way to go.
Getting Started with SMIME Certificate Setup
Once you’ve picked a CA, you’ll need to go through the certificate enrollment process. This can vary depending on the provider, but it generally starts with filling out a form with your email address and other identifying information.
For most users, the CA will handle the Certificate Signing Request (CSR) process in-browser or via downloadable tools. After verification, usually through email validation, you’ll receive your certificate file. It often comes in a .p12 or .pfx format, which includes both your public and private keys. Keep this file safe. It’s essentially the key to your digital identity.
Now comes the part that feels more technical: installation. Don’t worry, we’ll break it down step-by-step.
Installing the S/MIME Certificate on Popular Platforms
Like I said earlier, there several option you can use, but for the purpose of this guide we will use Actalis which offer a free option, go head and use any other one you want based on your needs and preference.
To get started, head over to the Actalis home page and scroll down and select the the S/MIME as highlighted on the image below.

Choose the free option and you will be redirected to another page. From there click the delete icon to take off the other tab showing €6, once that is done click on the “Proceed With The Order” button to continue.

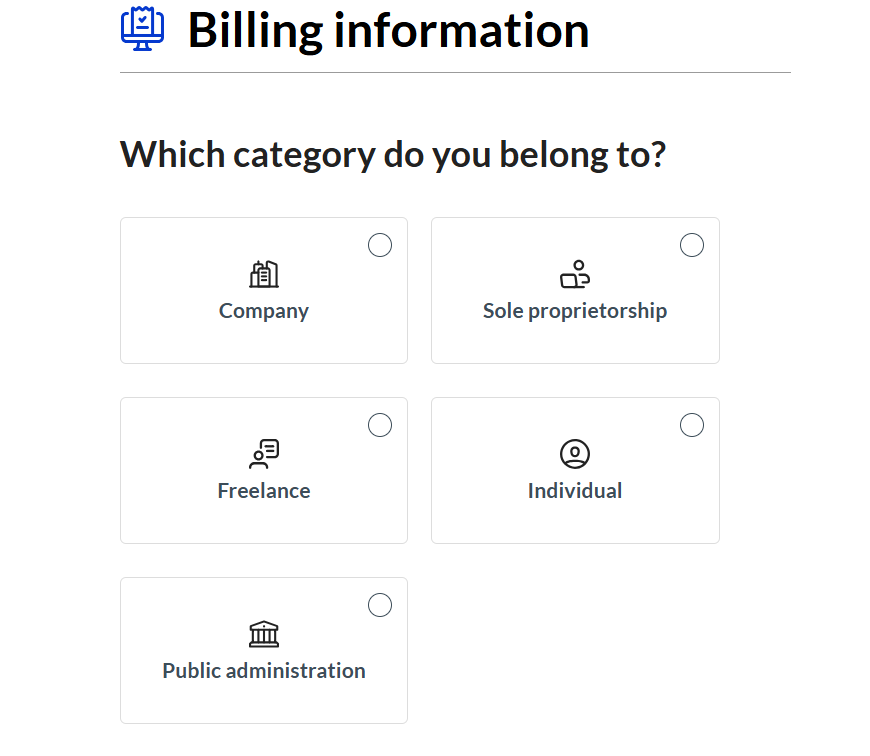
Proceed with selecting the category as shown below.
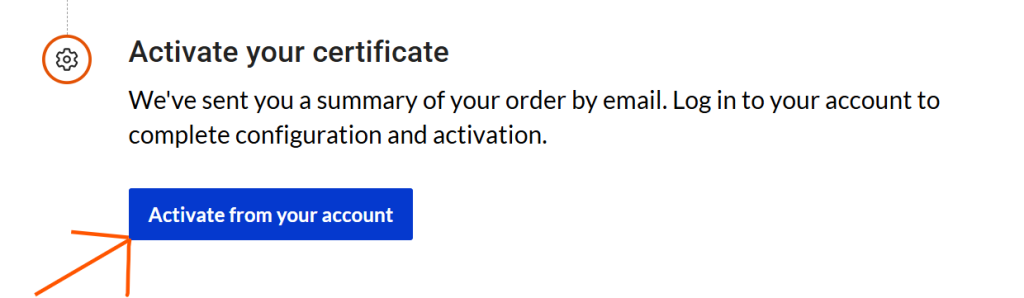
Follow the prompts and and complete all necessary step and you will be redirected to the page as shown below. Go ahead and click the “Activate from your account” button and it will navigate you to your dashboard,
Click on “activate now”, and follow the prompts to complete the process.

Once the process is complete, you will be required to enter the email you want to request verification for.

Enter the email and click the “Submit for verification button, once that is done, you will get the notification as shown below,

An email will be sent to containing your the password protecting the credentials issued to you. Now go ahead and download the certificate from your dashboard.

Click the download file and enter your password when prompted and continue.
Once you do that, follow the prompt and complete the process, and that is it. The download is complete and now it’s time to install.
Let’s begin with the most commonly used desktop platform: Microsoft Outlook on Windows.
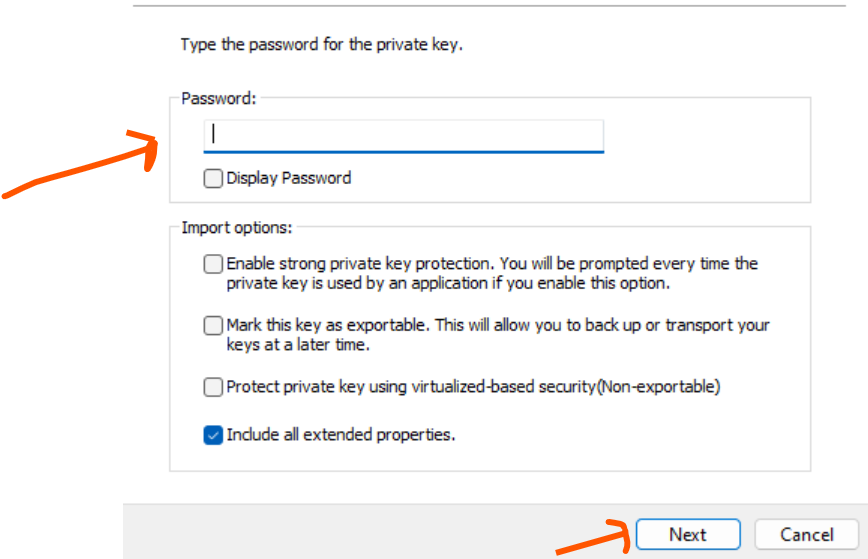
Once you’ve downloaded your certificate, you can simply double-click the file to open the Certificate Import Wizard. Follow the prompts, and be sure to import it under your current user profile. Once done, open Outlook and head to File > Options > Trust Center > Trust Center Settings > Email Security. Under the “Encrypted Email” section, select your certificate for both digital signing and encryption. That’s it, you’re set.

If you’re using Apple Mail on macOS, the process is similar but handled through Keychain Access. When you double-click the certificate file, it imports into your keychain. Then, open Apple Mail, go to Mail > Preferences > Accounts, and navigate to the Security tab. You should see your certificate available for use. Toggle options to sign and encrypt emails by default if needed.
For mobile users, especially on iPhones and iPads, installation is also straightforward. You can email the .p12 certificate to yourself (yes, ironically through an unsecured channel, but just this once) and open it from your iOS Mail app. The system will prompt you to install it and ask for a password. After installation, go to Settings > Mail > Accounts > Advanced > S/MIME and enable both signing and encryption.
The S/MIME certificate setup on Android can be trickier, often requiring third-party apps like Nine Mail or Outlook for Android, as Android lacks built-in S/MIME support. You’ll need to import the certificate into the app’s secure store and configure it accordingly.
Renewing and Managing Your Certificate
Certificates aren’t forever. In fact, most S/MIME certificates are valid for just one to two years. That means you’ll need to stay on top of renewal dates. Some CAs offer automatic renewal reminders or renewal portals, but it’s wise to set a manual reminder a few weeks before expiration.
When a certificate expires, you won’t be able to send encrypted emails , or worse, people won’t be able to decrypt messages you’ve sent. This could lead to workflow interruptions or compliance issues.
Renewal typically involves revalidating your identity and downloading a new certificate file. Once you’ve renewed, you’ll need to replace the old certificate in your email client settings. It’s also a good idea to send a new digitally signed message to your contacts so their systems can cache your updated public key.
Speaking of keys, your private key (contained in your .p12 or .pfx file) is something you should guard closely. If it’s ever compromised, you must revoke the certificate immediately through your CA. Reissuing a certificate is possible, but the delay can be costly, especially if you rely on encrypted communication for sensitive work.
Backing Up and Sharing Certificates Securely
People change devices, reinstall systems, or lose access all the time. Backing up your S/MIME certificate is an essential step in proper management. Export your certificate file with a strong password and store it in a secure location, such as an encrypted USB drive or a password manager that supports file storage.
Also remember that in order to exchange encrypted emails with someone, you need their public certificate, and they need yours. Usually, this happens automatically when you send a digitally signed email. Once a contact receives your signed message, their email client stores your public key, allowing them to send encrypted replies. No need to send a separate file just the signature will do.
Troubleshooting and Common Pitfalls
Even with proper setup, S/MIME can cause a few headaches if not managed properly. If Outlook doesn’t detect your certificate, you may have installed it under the wrong Windows user account or into the wrong certificate store. In this case, re-import the certificate manually using the Windows Certificate Manager.
Sometimes, encryption fails because the recipient hasn’t received your public key yet. This is why it’s recommended to send a signed email to new contacts before attempting to encrypt anything. Another issue might arise if your certificate has expired or been revoked, double-check your validity period before pulling your hair out over a “could not encrypt” error.
Conclusion
S/MIME isn’t just about compliance or tech jargon, it’s about trust. In an era where deepfakes, spoofed domains, and phishing attacks are becoming more convincing by the day, showing your recipients that your email is authentic and secure is a form of digital respect.
The SMIME certificate setup may seem like just another IT task, but it plays a frontline role in your organization’s security posture. Whether you’re a solo entrepreneur or part of a global enterprise, encrypted, authenticated communication isn’t optional anymore, it’s foundational.
As cybersecurity expert Brian Honan once put it, “Email is the number one attack vector, so it should be the number one place we apply strong security controls.”
So go ahead, get your certificate, install it, and stay ahead of the threats. It’s not just about protecting your messages; it’s about protecting your reputation.
Ready to Take Control of Your Email Security?
Download our free Email Security Checklist, packed with clear, practical steps to help you secure your communication with tools like S/MIME, TLS, and PGP.
Need help figuring out what works best for your team or company?
Request a free one-on-one consultation with a Tileris expert. We’ll help you navigate certificate authorities, installation strategies, and more, no strings attached.
Curious how AI is changing the security game?
Ask us about Tileris AI Agents. We’ll show you, live, how they simplify security tasks like certificate management and email threat detection. Just head over to our contact form and request a demo.