Step-by-step guide to enabling encryption in popular email platforms (Gmail, Outlook, Apple Mail)
Introduction
Email, bless its digital heart, is still the backbone of our online lives. We use it for everything from intimate family photos to sensitive financial documents. But here’s a thought that might make you squirm a little: without encryption, your emails are essentially like postcards. Anyone who intercepts them can read them. Yikes!
Now, before you go into a full-blown panic, I want to assure you that the good news is that enabling encryption for your emails isn’t some super-secret tech wizardry reserved for cybersecurity experts. It’s becoming more accessible, and in some cases, it’s already working behind the scenes for you.
Let’s walk through it together.
Your Digital Mailbox: Gmail
If you’re like millions of us, Gmail is your daily go-to. The good news is that Google automatically uses TLS for your connections. So, when you see that little lock icon in your browser when you’re on Gmail’s website, or when you access your mail, you’re already benefiting from a secure connection. You don’t need to do anything specific to “turn on” TLS, it’s just on.
However, for that deeper, end-to-end encryption (where only you and your recipient can read the message), Gmail for personal users relies on third-party solutions.
You’ll want to explore browser extensions like Mailvelope. Think of it as a handy helper that integrates PGP encryption right into your webmail.
Grab the Extension: Head to your browser’s extension store (Chrome Web Store, Firefox Add-ons) and search for “Mailvelope.” Install it.

Click the “add to Chrome” button to install

Generate Your Keys: Once installed, Mailvelope will guide you through creating your “PGP key pair.” This involves a public key (which you share with people so they can send you encrypted mail) and a private key (which you never share, as it’s what unlocks your encrypted mail).
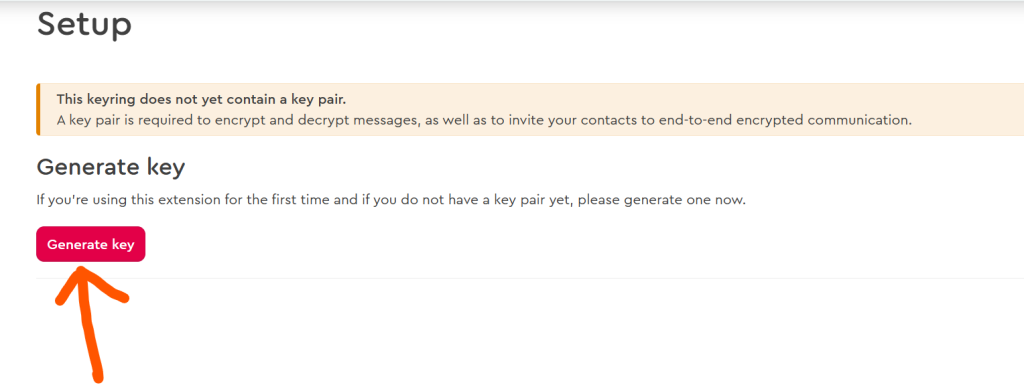
When you click oon the “Generate Key” you will be required to enter your details
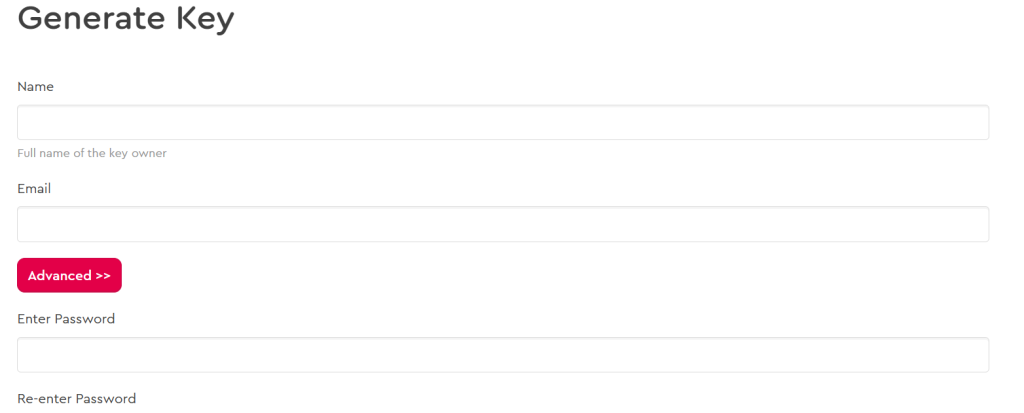
When you are done entering your details, click the “generate” button.

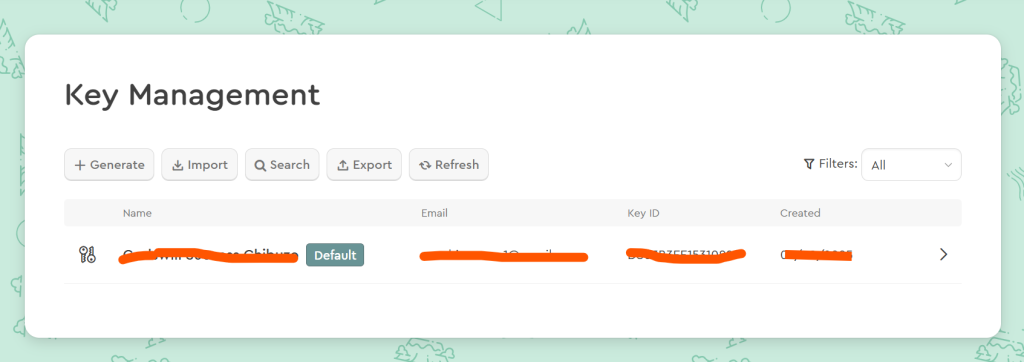
when you are done you will be redirected to the key management dashboard where you can manage your details
For end-to-end encryption to work, you and your recipient need to exchange public keys. It’s like giving someone your unique mailing address for the secure locked box.
When you want to send an encrypted mail, click Mailvelope Icon, instead of the usual “Compose”.

When you click the Icon it will redirect you to the Mailvelop message box, enter your message and all necessary information and “Send”

When you receive an encrypted message, Mailvelope will recognize it and help you decrypt it with your private key. It sounds a tiny bit clunky at first, but it’s effective.
The Microsoft Ecosystem
If you’re using the Outlook desktop application (part of Microsoft Office) or Outlook.com in your browser, here’s the lowdown.
Just like Gmail, Outlook.com (the web version) uses TLS automatically to secure your connection. Nothing for you to enable there.
For the Outlook desktop application, you have a couple of powerful options for end-to-end encryption:
Native Encryption
Microsoft have It’s own inbuilt encryption that work withing 365 and and microsoft outlook, but you need the right licensing for this. Usually this is the Microsoft 365 business premium, as it does not work with the Microsoft 265 business standard. This is how it works.
How It works
log on to the microsoft outlook web regardless which one you are using older or newer version the process is the same.
when you login, this simply enter all required information, that is the recipient email address, subject and the main message. then click on the “options button”
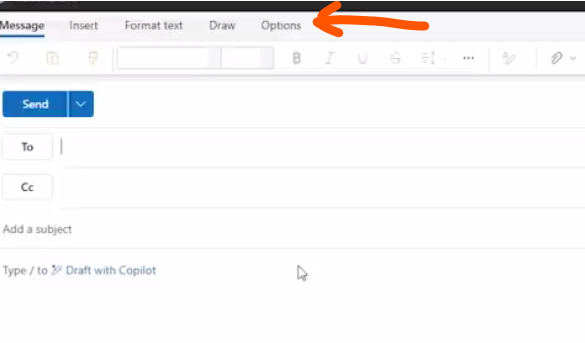
When you click on the it you should see a little padlock icon, click on the Icon and some options will drop down, from the drop down click on “encrypt”.

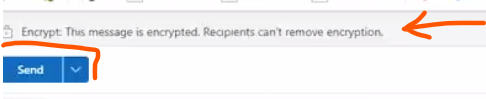
When you click on it, you will get a banner that says “This message is encrypted, recipients can’t remove encryption”. go ahead and click on send, and that’s it, just like that you email is encrypted.
S/MIME: The Built-in Solution
Outlook desktop client has great native support for S/MIME. This is often preferred in corporate environments.
- Get a Certificate: You’ll need an S/MIME certificate. Think of this as your digital ID card. You can obtain one from a Certificate Authority, some offer free personal certificates, others are paid. Your company might even provide one.
- Install It: Once you have the certificate file, usually a quick double-click will guide you through installing it onto your computer.
- Configure Outlook: Open Outlook, head to File > Options > Trust Center > Trust Center Settings… > Email Security. Here, you’ll select your S/MIME certificate for both “Signing” and “Encryption.”
- Exchange Digital IDs: For S/MIME encryption to work, you need your recipient’s public S/MIME certificate. The easiest way to get it is when they send you a digitally signed email. Outlook often automatically saves their certificate.
- Send Securely: When composing a new email, go to the Options tab in the message window. You’ll see “Encrypt” and “Sign” buttons. Just click “Encrypt with S/MIME,” and if Outlook has the recipient’s public key, off it goes, securely locked!
Apple Mail (on macOS)
Apple Mail, the default email client on your Mac, also embraces S/MIME, making it quite straightforward.
Just like with Gmail and Outlook.com, iCloud Mail (Apple’s webmail service) automatically uses TLS.
For the Apple Mail desktop application:
- Your S/MIME Certificate: As before, you’ll need to acquire an S/MIME certificate and install it onto your macOS system. Usually, double-clicking the certificate file will prompt you to add it to your Keychain Access (Apple’s secure storage for passwords and certificates).
- Mail Detects It: Once the certificate is correctly installed in Keychain Access and linked to your email address, Apple Mail usually just knows. You don’t have to go deep into settings menus.
- Sending Encrypted Mail: When you compose a new email in Apple Mail:
- For Encryption: If Apple Mail has the recipient’s public S/MIME certificate (either because they sent you a signed email or you imported it), you’ll see a little lock icon next to the “Subject” field. Click it to turn on encryption. A closed lock means it’s encrypted!
- For Digital Signatures: You’ll also see a checkmark icon next to the subject. Click this to digitally sign your email, assuring the recipient it truly came from you.
It’s surprisingly intuitive once your certificate is in place.
A Few Final Thoughts on Your Encryption Journey
- Key Security is King: Seriously, your private keys are the master keys to your encrypted world. Back them up securely, and never, ever share them!
- It’s a Two-Way Street: Remember, for S/MIME or PGP/GPG to work, both you and your recipient need to be using compatible encryption methods and have exchanged those all-important public keys. It’s like needing matching lock-and-key sets.
- What’s Not Encrypted? Even with the best end-to-end encryption, remember that the subject line, sender/recipient addresses, and other email “metadata” are typically not encrypted. So, keep that in mind for truly sensitive communications.
Conclusion
Enabling email encryption is a fantastic step toward reclaiming your digital privacy. the peace of mind knowing your important messages are truly private is absolutely worth it.
Yes, email encryption sounds intimidating. Private keys, digital certificates, public key exchanges… it’s enough to make your head spin. But once you get past the jargon, it’s really just about taking a few extra steps to protect your communication.
If you’re handling sensitive info or you just like the idea of keeping your messages private, setting up encryption is one of the smartest moves you can make.
Ready to Take Your Digital Security Even Further?
Now that you’ve got a handle on email encryption, why stop there?
Download your free security checklist today, it’s full of simple, practical steps to help you stay safe online, whether you’re sending emails, browsing the web, or locking down your devices. Think of it as your personal guide to digital peace of mind.
Want more support? You can request a free consultation with our security experts, we’re here to walk you through any questions or setup challenges. Or, if you’re curious about how Tileris AI Agents can strengthen your defenses in real time, request a demo through our contact form and see the power of intelligent protection in action.